Showing posts with label budget. Show all posts

Tuesday, July 26, 2016

Classic Potato Salad - a Healthier Version.


This healthier potato salad is light on mayonnaise, but with bolstered flavor from the help of a sweet and tangy shot of balsamic vinegar.


Ingredients: 
  • 3-4 medium red potatoes, about 1 pound
  • 1/2 small red onion, chopped or thinly sliced
  • 1 stalk of celery, chopped
  • 1 tablespoon of chopped pickles, preferably gherkins or cornichons, or use sweet radish
  • 2 tablespoons of mayonnaise (healthier homemade version)
  • 1 tablespoon of Dijon mustard
  • 1 teaspoon of white wine vinegar
  • 1 teaspoon of balsamic vinegar
  • 1 hard-boiled egg, chopped or sliced
  • pinch of cayenne, optional
  • pinch of smoked paprika, optional
  • Salt and pepper to taste
Directions: 
  1. Place the potatoes in a pot of cold water, with 1 teaspoon of salt and bring to a boil. Cook the potatoes until tender when you test with the tip of a paring knife that can cut through without much resistance. Drain and cool. Cut into half inch chunks.
  2. Place cut potatoes, celery, pickles, onions, mustard, mayonnaise, vinegar, and eggs in a bit bowl and toss to mix and coat evenly. Season with salt, pepper, cayenne and paprika.


Saturday, July 16, 2016

Homemade Teriyaki Sauce!


Teri-yaki (照り焼き) is a Japanese cooking process of grilling (yaki, 焼き) and glazing the meat with a soy based sauce to make it shiny and glistening (teri, 照り) .

The basic Japanese teriyaki sauce ratio is 2:1:1 -- 2 parts of soy sauce, 1 part of mirin and 1 part of sake -- when used in cooking process as a glaze or a flavoring sauce. When making it as a dipping sauce, use equal part (1-1-1) of soy sauce, mirin, sake; then add and adjust the sugar to your taste.

Remember, any sauce you are making, don't over-flavor it so it can stay general-purposed and useful in many preparations. You can always adjust and add more but you can not take out what is already in there.

The store-bought American version of teriyaki sauce is leaning toward the sweet end of the spectrum, if that is what you are familiar with. I suggest you use the basic proportions and adjust the sugar level. Don't over sweeten it. If you have one of those bottles, try adding more soy sauce and sake to it next time.

Ingredients:
Basic for cooking: 
  • 1/4 cup soy sauce
  • 2 tablespoons of mirin or replaced with 2 tablespoons of rice wine and 1 tsp sugar
  • 2 tablespoons of sake or rice wine
  • 2 to 3 teaspoons of brown sugar, adjust to your taste
Basic for dipping sauce:
  • 2 tablespoons of soy sauce
  • 2 tablespoons of mirin or replaced with 2 tablespoons of rice wine and 1 tsp sugar
  • 2 tablespoons of sake or rice wine
  • 2 to 3 teaspoons of brown sugar, adjust to your taste
  • 1 1/2 teaspoons of cornstarch 
  • 1 tablespoon water to mix with cornstarch
To punch it up:
  • 1/4 tsp freshly grated ginger or 1/8 tsp ground ginger
  • 1/4 tsp freshly minced garlic or 1/8 tsp garlic powder
  • 1/4 tsp sesame oil
  • 1/4 tsp toasted sesame seeds
  • Replace sugar with maple syrup or honey
  • Optional, add a touch of pineapple juice or vinegar

Directions:
  1. To cook with it: Mix up and add it to stew browned fish or meat or brush on skewed meat.
  2. To make dipping sauce: Mix up and bring to boil. Turn heat low and simmer until it thickens.

Notes:
  • If you don't have mirin, for each 1 tablespoon of mirin, replace it with 1 tablespoon of sake or cooking wine and 1/2 teaspoons of sugar.
  • To make it even better, you can use maple syrup or honey to replace sugar.
  • Store-bought sauces use refined sugar while using honey or brown sugar will make the sauce taste rounder, balanced with a molasses note.


Homemade Crème Fraiche!


Ingredients: 
  • 1 cups heavy whipping cream (at least 36-40% milk fat.)
  • 1 1/2 tablespoons cultured buttermilk (real buttermilk with a live culture in it.)

Directions:
  1. Clean a jar thoroughly and sterilize it in boiling water for 10 min. Let it dry completely before using. 
  2. Pour the heavy cream into the clean jar and add the buttermilk.
  3. Mix together and cover with cheesecloth (I use twine to tie it up), a coffee filter or something breathable.
  4. Leave it at a warm spot (about 70°F - 75°F) for 24 hours until thickened.
  5. Keep refrigerated for 24 hours before using. It lasts about a week or two.
Notes:
  • You can slightly warm the cream up first before mixing in the buttermilk to speed up the process. Basically the warmer it is, the faster the reaction is. 
  • Unlike sour cream, the cream won't curdle and break when cooked.
  • It's tart and tangy with a deeper flavor and a nutty note, better than sour cream.

Thursday, July 14, 2016

Artichoke Dip.


Ingredients (yield 5-6 servings): 
  • Whole wheat ortilla or pita bread, cut into wedges to make chips
  • One 12-oz jar of artichoke hearts in water, drained and chopped
  • One box of chopped frozen spinach, thawed
  • 4 to 6 frozen or roasted green chiles, rinsed, drained and chopped (adjust to your liking of heat)
  • One small onion, finely chopped
  • Two cloves of garlic, finely chopped
  • 2 tablespoons of mayonnaise (homemade recipe)
  • 2 tablespoons of creme fraiche or whipped cream cheese
  • 1/2 tablespoon oil or butter
  • Juice from one lemon
  • Salt and pepper to taste

Directions:
  1. Spread bread wedges on two baking sheets and bake at 400°F for 5 to 6 minutes until crisp.
  2. Heat up the oil in a skillet or saute pan over medium heat. Add the onion and garlic to cook for 3-4 minutes until softened. Add the artichokes, spinach, chiles, mayonnaise, cream cheese, and lemon juice. Cook and stir constantly for 5 minutes until hot. 
  3. Season with salt and pepper. Serve with tortilla wedges, chips, pita bread, toasted baguette, breadsticks, you name it and dip in!

Notes:
  • Use the dip for toasted artisan bread, vegetable sticks.
  • Use the dip to make sandwiches.


Homemade Mustard!


Ingredients (yield 1 cup about 250g):
  • 1/3 cup (55g) mustard seeds
  • 1/3 cup (80ml) white wine vinegar
  • 1/3 cup (80ml) dry white wine (or water)
  • 1 tablespoon caster sugar or turbinado sugar 
  • 1 teaspoon ground turmeric
  • 1/2 teaspoon salt
  • big pinch of cayenne
  • 2-4 tablespoons warm water, if necessary
  • optional: 1-3 teaspoons prepared horseradish, to taste

Directions:
  1. Combine all the ingredients, except the horseradish, in a stainless-steel bowl. Cover, and let stand for 2-3 days.
  2. Put the ingredients in a blender and whiz until as smooth as possible. Add 2 to 4 tablespoons of water if the mustard is too thick. Blend in the horseradish, if using.


To store: The mustard will keep for up to 6 months refrigerated, although it’s best if used within one month.

Sunday, June 12, 2016

Creamy Black Sesame Seed Hot Cereal! Three Ways!


It's a traditional Chinese hot cereal (or porridge) made of rice and roasted black sesame seeds, that can be spotted on a dim sum (點心) menu. If you need something warm in the morning other than coffee, this is a great choice especially if you use whole grains. Prepare it the night before and put in the refrigerator. Heat up in the microwave in the morning, dump it into the thermo and off you go.

Ingredients (yield one servings): 
Option 1:
  • 1/4 to 1/3 cups of ground black sesame seeds
  • 3/4 cups of water 
  • 2 teaspoons of uncooked short grain white rice
  • 1 to 2 tablespoons of honey or sugar
  • pinch of salt
Option 2:
  • 1/4 to 1/3 cups of ground black sesame seeds
  • 1/2 cups of water 
  • 30 grams (about 1/3 to 1/2 cup, loosely unpacked) of steamed short grain white rice
  • 1 to 2 tablespoons of honey or sugar
  • pinch of salt
Option 3:
  • 25 grams of roasted black sesame seeds
  • 3/4 cups of water 
  • 8 grams of rice flour (about 1 plus teaspoons)
  • 1 to 2 tablespoons of honey or sugar
  • pinch of salt

Directions:
I use option#1 but I list the proportions in option#2 and #3, depending on what you can find in your pantry or neighborhood markets.

Option 1:
  1. Rinse the raw rice and place that with water in a small sauce pan. Cook it for 20 min. When it's done, let it sit for 30 - 60 min and it will thicken up further.
  2. Combine ground black sesame seed meal and rice porridge. Transfer the mixture to blender or food processor. Pulse 10 second for three to four rounds. It should be pretty smooth.
  3. Place the mixture and salt in a small sauce pan on medium-low heat. Bring to a gentle simmer. Stir the honey or sugar in until dissolved. Let it cool for 10 min. You can also process this last stage cook in the microwave. Cook on high (1200W) for 1-2 minutes. Check the doneness. Repeat to cook at 30 second intervals if necessary.
  4. Serve or keep refrigerated until ready to serve. 

Option 2:
  1. Mix the cooked rice with water and cook for 20 min. Let it sit for 20-30 min to cool down and thicken up.
  2. Combine ground black sesame seed meal and rice porridge. Transfer the mixture to blender or food processor. Pulse 10 second for three to four rounds. It should be pretty smooth.
  3. Place the mixture and salt in a small sauce pan on medium-low heat. Bring to a gentle simmer. Stir the honey or sugar in until dissolved. Let it cool for 10 min. You can also process this last stage cook in the microwave. Cook on high (1200W) for 1-2 minutes. Check the doneness. Repeat to cook at 30 second intervals if necessary.
  4. Serve or keep refrigerated until ready to serve. 

Option 3:
  1. If you use whole black sesame seeds, grind them in coffee grinder for the best result. Or add the water and pulse in a blender. You can use ground black sesame seed meal as above and make it even easier.
  2. Mix the rice flour with black sesame seed water mixture evenly. 
  3. Place the mixture and salt in a small sauce pan on medium-low heat. Bring to a gentle simmer. Stir the honey or sugar in until dissolved. Let it cool for 10 min. You can also process this last stage cook in the microwave. Cook on high (1200W) for 2 minutes. Check the doneness. Repeat to cook at 1 minute intervals if necessary.
  4. Serve or keep refrigerated until ready to serve. 

Note:
  • If you use whole white sesame seeds, toasted it at 325F for 10 min. Put in blender with water and pulse until smooth. Pass through fine mesh strainer to remove bigger pieces before mixing with rice. 
  • As a variation for option#3, you can just mix up everything and cook in a small saucepan for 20 min. Add sugar and salt. That's it. 
  • If you are a member of our one-knife-one-pot club, use the ground black sesame seed powder and you don't have to blend-pulse it. It tastes just as good with the rice porridge. 
  • Use whole grains to replace refined rice. I use brown rice, steel cut oatmeal, and other whole grains to replace white rice, topped off with chia seeds, cooked quinoa, amaranth or millet. Will provide my recipe later. 
  • To cook quinoa, use one part quinoa and 2 parts of water. Cook 20 minutes, let it sit for 10 minutes covered in steam. Then fluff with fork. 
  • Grains like quinoa, amaranth, millet, buckwheat, teff, bulgar, spelt, kamut or khorasan, sorghum have low GI, low or no glutton, higher level of protein and nutrients, and are more environment-friendly. In general they are easier to grow in tougher climate and soil conditions than rice or wheat, so they are better for you and your planet. I really have to tell you more about them later. 
  • Instant package usually contains too much sugar and starchy thickening agent. As you can see here, it's not hard at all to make it at home.


Saturday, June 11, 2016

Simple Tomato and Ham Soup!


This soup is what I made out of the chicken bones, removed from the chicken breast (my homemade chicken breast sandwich meat). I had some sandwich ham from last week so I threw that in.

When use the sandwich ham or the cooked chicken breast slices to pump up the protein, don't put in too early and overcook them. Add them lastly after everything else is fully cooked to your desired doneness.

There are many vegetables that can add natural savory flavors to your soups or dishes. (I will talk about that later.) Tomato is one of them. The dried Chinese yam and longan also help to bring more complexity to the result, with a touch of sweetness.

The soup is infused with all the natural flavors released from the ingredients that I add no other seasoning to my soup, but if you like it, season away with some salt.

Ingredients (yield 2 servings):
  • 1 cup of cut or diced tomatoes
  • three longan pulp or with pit (out of shell)
  • 3 to 4 pieces of dried Chinese yam (huai shan, what?), rinsed and drained
  • one scallion, cut to short sticks
  • 1/4 cup enoki mushrooms, cut into shorter strips
  • 3 cups of water
  • 2 teaspoon of goji berries, rinsed
  • 1 slice of ham.
  • salt to season (optional)
  • ground white pepper (optional)
  • chopped scallions (or green onions) to garnish

Directions:
  1. Place tomatoes, longan, dried Chinese yam, scallion sticks, enoki mushrooms and water in a soup pot. Bring to boil and cook at least for 30-40 minute. I cooked for 1 hour. 
  2. Lastly, put in your ham or chicken to warm up before serving. 
  3. Put the rinsed goji berries in. At this point you can turn the heat off and let it seep for 5 min.
  4. Serve with chopped green onions and ground white pepper. 
  5. Season with salt if desired. 

Friday, June 10, 2016

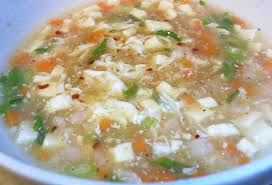
Garlic Detox Tofu Soup!


Ingredients (yielding one serving):
  • 1 1/2 cup of water
  • 1/4 cup green bell pepper sliced (about 1/2 bell pepper)
  • 1/4 cup sliced shiitake mushroom from one mushroom
  • 1/4 cup thinly sliced daikon turnip
  • 1/3 cup diced tofu (about 1/8 of a block from the box, or 30 grams)
  • 1/2 teaspoon minced garlic
  • 1 teaspoon soy sauce
  • 1 teaspoon cornstarch and 1 tablespoon water to make slurry

Directions:
  1. Thinly slice green bell pepper, daikon turnip and shiitake mushroom. Dice tofu.
  2. Mix 1 teaspoon in 1 tablespoon of water. 
  3. Place shiitake mushrooms, tofu, daikon, soy sauce, garlic and water in small soup pot and bring to a boil.
  4. Cook for 10 min, and add the green bell pepper. Add the cornstarch mixture to thicken. Bring back to boil again, stir to mix evenly and turn the heat off. 
  5. Serve with some ground white pepper. 
  6. Season with more salt if desired.

Miso Detox Soup!

Ginger is great to warm you up and promote circulation.

Ingredients (yield one serving):
  • 1 cup onion (about 30g), sliced
  • 1 cup cabbabe leave (about 50g) cut up
  • two shiitake mushrooms (about 40g) sliced
  • 1/2 cup water
  • 1/2 cup unsweetened soy milk or almond milk
  • 1/2 tbsp miso (preferably white miso)
  • 1 tsp minced ginger
  • chopped scallions or green onions (optional)
Directions:
  1. Put ginger, vegetables and water in a small soup pan. Bring to a boil and turn to low heat. Simmer 4~5 min until the vegetables are softened.
  2. Add soy milk or almond milk, miso and keep stirring until all are mixed evenly. 
  3. Turn the heat off. Serve with chopped green onions.
Note:

  • Feel free to add tofu dices (about 1/4 cup).
  • Feel free to add some wakame seaweed.

Basic Detox Soup!


This soup is high in potassium and fibers that can help reduce water retention and alleviate constipation problems.

Ingredients:
  • equal part of the following vegetables:
    • 1 cup of cut or diced daikon or white turnip
    • 1 cup of cut or diced shiitake mushrooms
    • 1 cup of cut or diced tomatoes
    • 1 cup of cut or diced onions
    • 1 cup of cut or diced cabbage
  • 5 cups of water
  • salt to season (optional)

Directions:
  1. Place all ingredients in a soup pot with water. Bring to boil and cook for 10-15 minute if you prefer the vegetables to remain crunchy, or cook for 30-40 min if you prefer them tender.
  2. Use salt sparingly especially if you try to reduce water retention.

Thursday, June 9, 2016

Homemade Chicken Breast for Sandwiches.


I like buying chicken or pork with bones because the bones are the flavor bombs. They are the reasons for broth and stock to be the flavor foundation for every savory dish. Foodies know the meat next to bones are the tastiest part of the whole.

I buy the bone-in skin-in chicken and cook them with bones and skin for the flavor. Then I remove the skin and separate the bones from the flesh. Collect those bones and make broth with vegetables. Here is how.

I placed a 8 3/4 inch chopstick along each side of the chicken in the picture. The left piece is around 18 ounces and the piece on the right is 15 ounces, just to give you an idea.

Ingredients:
  • Chicken breasts about 17 to 18 ounces and 2 inch thick each piece with skin on and rib cage bones. (To save time, you can use boneless and skinless chicken breast but the cooking time needs to cut back 4-8 min.)
  • 1 1/2 tablespoons salt
  • 2 teaspoons sugar
  • 1 quart of water to cook chicken
  • Formula for brine (for 1 days):
    • 1 tablespoon sea salt
    • 2 teaspoon sugar
    • 1 quart (4 cups) of water
Directions:
  1. If you choose to brine, use the formula above and brine in the refrigerator for at least one day, up to two days. Mix salt and sugar in water and submerge chicken breasts in it. Leave in the refrigerator for 24 hours. 
  2. Take the chicken breasts out of refrigerator and drain the brine liquid. Rinse the chicken breasts. If you don't want to cook with the skin, you can remove it. 
  3. Heat up 1 quart of water with 1 1/2 tablespoon sea salt, 2 teaspoons sugar and bring to a boil.
  4. Put the chicken breasts in. For 1 quart of water, you can fit 2 pieces. Bring to a boil on high. Turn to low heat as soon as it starts to boil. Cover and simmer for 16 minutes and turn the heat off. If you have an electric stovetop, make sure to turn heat off early, around 14 to 15 min as it will take sometime for the stove to respond and to cool. I turn my electric stove off around 15 min. (If you find your chicken breasts on the grainy side, adjust the cooking time and turn the heat off earlier next time.)
  5. Put the lid on and keep it covered. Let it sit there in the hot water for 10 min to 12 min. Check after 10 min with one chopstick or a fork. You need to be able to stick it through the cooked flesh with a little resistance. If you can't stick it pass the center, let it sit there covered for another 5 to 10 minutes and check with fork again.
  6. Transfer the chicken breasts to the plate and let it cool completely before cutting. 
  7. At this point, if I cook more, I'll freeze some pieces after removing the skin and bones for later use. This will effect the texture a little but saves me time.
  8. Remove skin and bones. Toss away skin but keep the bones to cook in soups.
  9. Slice chicken into slices for sandwiches or soups.

Note:
  • Why do I make my own while it's so convenient to get it from the supermarket? I don't like what they add in there to prolong the shelf life, neither the amount of sugar they use in it. I like my chicken to taste like chicken with just enough salt.
  • Chicken breasts can be really dry and grainy when overcooked. The solution is to brine them to keep them moist at the cost of some flavor. Use less salt (2 teaspoons) if you are to leave it for 2 days.
  • I don't brine my chicken as I like full chicken flavor but I watch the cooking time closely to make sure it's not overcooked.
  • You can choose to dry-brine (aka extended salting). Rub one to two teaspoons of salt all over chicken breast and leave it in the refrigerator overnight. Rinse when you're ready to cook it.
  • Cook time is about 7-8 min per inch of meat in simmering water plus 10 min leaving in hot water after the heat is turned off. 
  • For a 16 ounce skinless boneless chicken breast, cook 8 minutes per inch and leave it in hot water covered for 10 minute.
  • Always let cooked meat rest before cutting or the juice will run out and the meat will be dry.

Wednesday, June 8, 2016

Homemade Mayonnaise - Cheaper and More Delicious!


The good thing about making your mayo is that you could use good high quality olive oil that is good for your health.

Ingredients (yield about 2 cups): 

  • 1 cup olive oil
  • 1/2 cup vegetable oil 
  • 2 egg yolks
  • 1 tablespoon white wine vinegar
  • 1 tablespoon fresh lemon juice from half of a lemon
  • 1 teaspoon Dijon mustard
  • 3/4 teaspoon salt
  • 1/8 teaspoon sugar
  • pinch of black pepper

Directions:
  1. Dump the egg yolks into a tall container, a mason jar, or the beaker that comes with the stick blender (immersion hand blender). Add lemon juice, white wine vinegar, salt, sugar, Dijon mustard into egg yolk. Top with a cup of olive oil and 1/2 cup vegetable oil. Let it settle for 10 second.
  2. Stick the hand blender to the very bottom of the container or beaker. Start very gentle and slow and just pulse 5 second to begin with. Pulse slowly at 5 second intervals until you see the white thick cloudy emulsion starts to form from the bottom after the first 10 to 20 seconds. Then move the blender around to whip the whole thing into thick mayo.
  3. Just a few second and voila! There you have your homemade mayonnaise.

Note:
  • This recipe is on the tangy side. If you like a sweeter mayo, reduce the wine vinegar to 2 teaspoons. 
  • You can also make it in the food processor following the same drill.

Monday, June 6, 2016

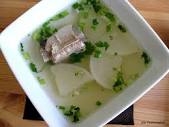
Simple Two Ingredients Soup!

Well, to make a soup, you can make it as complicated as Pork and Daikon Soup, or you can make it quick and easy like this.

Ingredients:
  • 1 pound Pork Spareribs
  • 1/2 pound of daikon or turnip, peel and cut into chunks. 
  • 5 cups of water
  • 1 tsp salt

Directions:

  1. Cut the ribs into smaller pieces between the bones.
  2. Wash them thoroughly. If you have time, blanch (what??) them in boiling water so the end result soup will be clear without too much scums.
  3. In soup pot, add all ingredients including the blanched ribs and cook for 30 to 45 min, depending on how tender you like your daikon to be. 
  4. Salt to season and serve.

Note:
1. Blanch means to cook an ingredient in boiling water for a short period of time and fish out to rinse in cold water. 

Options:
  • Serve with sesame oil.
  • Serve with white pepper.
  • Serve with chopped scallion (green onion) or chives.
  • Replace pork ribs of other pork portions, preferably with bones because the bones are more flavorsome than the meat. However, it's okay to use boneless lean pork, such as top loin or even tenderloin. 
  • Replace daikon and cook ribs with tomatoes (cut into 8 wedges).
  • Replace daikon with cauliflowers  (cut into big pieces) or cook both with ribs.
  • Replace daikon with English cucumbers (peel and remove seeds, cut into thick slices) or cook both with ribs.
  • Replace daikon with Chinese yam (peel and cut into chunks) or cook both with ribs.
  • Add carrots (peel and cut into chunks) so it will be ribs, daikon and carrot soup.
  • Add celery (cut into chunks) so it will be ribs, daikon and celery soup.
  • Add 2 slices of ginger in the very beginning. Boil water with ginger and ribs for 15 min before adding the rest to cook 30 min more.
  • Add one green onion, cut into long sticks. Add with the daikon (or replacement vegetable).
  • Add 1 tablespoon Chinese rice wine together when you add ribs.
  • Add 1 to 2 table spoon of Goji berries, rinsed. Add them in the last 5 min of cooking process.
  • and on and on...  

Secret Weapon:
  • Add 1/4 teaspoon dashi (What?).

Pork and Daikon Soup.

The burdock root can be found in Asian grocery stores and is optional if you can't find it. It is a great source of fibers. 

Ingredients (yield 6 servings)
  • 1 lb of lean pork or spareribs
  • 1lb of burdock root (or gobo), peel and cut into chunks.
  • 1 lb of daikon (or turnip), peel and cut into chunks.
  • ½ lb of carrot, peel and cut into slices.
  • 3 slices of ginger root
  • 2 tsp cooking wine
  • ½ tsp salt 
  • ½ tsp white pepper
  • 8 cups of water

Directions:
  1. Cut the lean pork to ¼ inch slices. Marinate with cooking 1 tsp of wine, salt and white pepper for 15 min. If you use the spareribs, cut into small pieces between the bones.
  2. Bring up a pot of water to boil and blanch the pork for 1 min. Drain and set aside.
  3. Boil 8 cups of water with ginger. Add pork, burdock, daikon, carrot and 1 tsp of cooking wine. Bring to boil and turn to low heat. Cover to simmer for 30 min. 
  4. Add salt to season and cook for 10 more min.
  5. Serve with cilantro if desired.

Note:
1. The carrot can be added later if you like it with a bit crunch.
2. Using spareribs will make the soup richer in flavor.


Simple One Ingredient Soup!

I don't count canned chicken soup as ingredient and it can be optional.

Simple Egg Drop Soup:

Ingredients (yield one serving):
  • one large eggs
  • 1 cup Canned Chicken Soup
  • 1 cup water
  • 1/2 teaspoon salt.

Directions:
  1. Beat the egg to mix egg yolk and egg white.
  2. Boil 1 cup chicken soup with 1 cup water on medium high.
  3. When water is rolling boil, turn the heat to medium, and slowly drizzle the egg mixture into the boiling ware, in a steady stream to create egg ribbons. 
  4. Season with salt and serve.

More Options:
  • If you don't have canned chicken soup, use 2 cup water with one pack of Nissin Top Ramen seasoning pack to make soup base.
  • To step up, some options,
    • Cook with corns.
    • Cook with diced carrots.
    • Cook with tomato cut into 1/2 inch chunks.
    • Cook with soft tofu cut into small cubes.
    • Cook with 4 to 5 goji berries. 
    • Serve with sesame oil.
    • Serve with white pepper.
    • Serve with chopped scallions (green onions) or chives. 

Secret Weapon:
  • Add 1/4 teaspoon dashi (What?).

Friday, June 3, 2016

Cook Your Own Beans.


In a pinch, you may use canned beans, but if you don't like canned food, you should cook your own.

It's pretty easy to cook it if you know the trick.

1. Soak it well

Small beans like adzuki beans or mung beans, soak for at least 2 hours. Bigger beans like white beans, kidney beans or garbanzo beans  (aka chickpeas), soak for 8 hours or overnight.

2. Cook low and slow

It's okay to add ham but to speed up the cooking process, don't add salt or sugar until almost cooked. Then add salt towards the end to add flavor.

3. Simmer, not boiling hard in a big pot

If you want them creamy in the center while not split or burst at the seams ( a sign of overcooking), don't let the beans roll vigorous in the boil. Keep the heat low and gently simmer with just a few bubbles breaking at the surface.

4. Cool in their cooking water

Or the skin will shrivel and crack. Let them cool completely in their liquid, drain them. If not to finish them all at once (I cook for the whole week), keep them refrigerated in their liquid, or marinate them, toss with salt, pepper, olive oil, and herbs.

5. Cook more than one serving

To save the trouble, I always cook more than what I will eat at one meal. They are a great source of plant-based protein and are good in about everything from salads, egg dishes to soups. (Check out my strawberry soup with chickpeas). Refrigerate or freeze the excess beans for later.

Also, check out my bean page to know why it's better to soak longer, to 2 days.


Monday, May 30, 2016

Icy Espresso Granita for Summer.

This is better than the ice cream, and it's lighter!

Ingredients:
  • 2 cups strong coffee, warmed up
  • 1/3 to 1/2 cup sugar
  • some whipped cream or use the light whipped topping to save 50 calories
  • 1/2 cup shaved dark chocolate (I like 75% and above)
Directions:
  1. Add the sugar into coffee and stir to  dissolve it. Pour the mixture into a shallow metal baking pan, about one inch deep, and place in freezer.
  2. After 18 to 20 min when the mixture just starts to freeze, Take out and use a fork to scrape and turn the ice. Break up the ice when you scrape can make the texture and mouthfeel fine and smoother. Repeat freeze and scrape/turn every 30 min until it's frozen through.
  3. To serve, use a tall glass or wine glass. Layer a scoop of the granita ice with whipped cream and some chocolate shavings and repeat a second time for another set of granita, cream, chocolate layers.
  4. Enjoy.


Note:
Whip your own fresh cream isn't hard at all. It tastes better and it is healthier than that from a can.

Sunday, May 29, 2016

My Barbecue Sauce.


Ingredients:
  • 1 1/2 cups ketchup
  • 1/4 cup light or dark molasses (not blackstrap)
  • 1/3 cup packed dark brown sugar
  • 1 tablespoons cider vinegar
  • 2 tablespoons Worcestershire sauce
  • 2 teaspoons chili powder
  • 2 teaspoons garlic powder
  • 2 teaspoons paprika
  • 1/2 cup water
Directions:
  1. Put all ingredients in a saucepan and bring to a simmer over medium heat.Whisk occasionally. 
  2. Reduce the heat to low and continue to simmer. Cook until the flavors have melded and the sauce has reduced to about 2 cups, about 30 to 40 minutes. Whisk occasionally to make sure it doesn't burn.
  3. Remove from the heat and set aside until ready to use.

Friday, May 27, 2016

Tofu Tips and Types.


Tofu types are usually categorized by texture, which depends on how much liquid are left in it after being pressed.

Silken (soft,medium or firm) – 
Made without pressing out the liquid. It is very moist and has the smoothest, custard-like texture and is best served out of container without cooking. However, you can use it in dishes like hot pot, soup or you can deep fry it to contrast the uniquely silky texture with crunchiness from other parts of the dish. You can also use it to blend up a smoothie so it helps to thicken up the drink, rather than using soy milk.
BlockTofu
Soft Block Tofu –
A bit firmer than silken tofu but softer than Firm tofu. Can be used in soup, stew or even stir fry dish. It holds up better in stew dish as Silken tofu is too soft for that.
Medium – Good for stew, stir fry. It contain less liquid than soft tofu.
Firm – Good for stew, stir fry, or braising dishes. It is pressed to contain even less liquid.
Extra firm – 
The firmest you can get in the grocery market.
Egg tofu – 
Made from egg and soy milk. Check out my recipe for Egg Tofu Recipe.

Tofu By-Products:

yuba2

Tofu Skin (Yuba in Japanese)
 – 
During the boiling of soy milk in an open shallow pan, a film or skin forms on the liquid surface. The films are collected and dried into yellowish sheets known as tofu skin. It has many applications in Asian cuisine.


Aburaage
Abura-age

Aburaage (油揚げ ) – 
Japanese food product by cutting tofu into thin slices and deep fry first at 110–120 °C, and then again at 180–200 °C. Aburaage is often used to wrapinari-sushi (稲荷寿司), and is added to miso soup or udon noodle dishes. There is a thicker variety known as atsu-age (厚揚げ) or nama-age (生揚げ) and both can be found in many Asian grocery store.
Atusage
Atsu-age

Bean Curd – 
Plain or five spice bean curd.

Tofu Tips:

To make mashed tofu – Boil Tofu in salted water for 1 min. Strain and press through a fine-mesh strainer with a spoon. You can get rid of extra liquid by putting the tofu in cheese clothes and press out the excessive liquid with both hands.
Meshed_tofu

Check out my Tofu Recipes.