Wednesday, June 29, 2016

Ratatouille.


This is a simple vegetable stew dish and the flavor starts from saute-ing some onions to caramelize them and also to take off the edge of its harsh, sulfurous quality in the taste.

Ingredients (yield 2 servings):
  • 2 tablespoons light olive oil
  • 1/4 cup of onion, diced into quarter-inch pieces
  • 1/4 cup of eggplant, diced
  • 1 teaspoon of tomato paste
  • 1/4 cup of tomato concasse
  • 1 tablespoon of garlic, chopped coarsely
  • 1/4 cup for each of red, yellow, and green peppers
  • 1/4 cup of zucchini, diced
  • 1 tablespoon for each of freshly chopped thyme, parsley, oregano
  • 1 to 2 cups of chicken or vegetable stock
  • salt and ground black pepper to taste
  • 1 teaspoon extra virgin olive oil for finishing touch
  • toasted baguette or brown rice (optional)
Directions:
  1. Heat up the pan on medium high and saute some onions with olive oil until it's softened and browned on the edges. 
  2. Add the diced eggplants and saute for a while. eggplants need to be fully cooked in order to taste good. They are also very "thirsty" like a sponge and tend to absorb a lot of oil. Add more oil as you go if you observe the pan dries up too quickly.
  3. Add garlic and tomato paste to the bottom of the pan and saute it until it changes from a very bright red color to brick-like red. This will add the color and flavor to the dish. Make sure it doesn't burn. When it dries up and start to stick to the pan, that's when you need to dump in the tomato concasse or diced tomatoes. Turn the heat to medium and add diced bell peppers, zucchini. Stir up for 2 minutes.
  4. Add the stock just to cover all the ingredients and let it stew on medium low heat. Add chopped herbs. Put the lid on and turn the heat down to low. Simmer for 20 minutes. Season with salt and pepper. Cook till the vegetables are very tender.  
  5. Serve with a dash of extra virgin olive oil and a toasted baguette. There you go a nice light lunch.
Note:
  • Add cooked beans, grains for a more sustainable vegetarian meal.
  • Add green beans, peas, corns, carrots, or even tofu, whatever you have.
  • Add diced chicken breasts (my homemade ready-to-go chicken breasts recipe) or leftover sandwich ham, turkey, if you are not a vegetarian.


Chicken Marsala.


The wonderful flavor comes from the right wine to the right ingredients.

The cooking process utilize saute-ing (a type of dry-heat cooking with fat, cooking techniques). Use a pan that's large enough so you don't crowd the chickens when you brown them. If the pan is too small, the heat will drop too much when the chicken hits the pan and the chicken will end up simmering in their own juice. By the time they are properly browned, they will be overcooked and grainy.

If the pan is too big, there will be areas of the pan without food to absorb the heat, where the oil may burn in those areas. If this happens when you are cooking, pour a few drops of cooking wine to prevent the burn. (More tips about high heat cooking and browning.)

Ingredients (yield 2 servings):
  • 2 chicken thighs or boneless chicken breasts, skin on, about 1 inch thick
  • 2 shallot minced
  • 2 cloves of garlic minced
  • 3 tablespoons fresh parsley
  • 3 tablespoons canola or vegetable oil
  • 1 tablespoons butter 
  • 8 button mushrooms, sliced
  • 1/3 cups chicken stock
  • 1/3 cup dry or regular Marsala wine ( or dry Sherry, Madeira, or use white wine such as sauvignon blanc)
  • 1 bay leaf
  • 1 branch of thyme
  • 2 tablespoon heavy cream or butter
  • 1 tablespoon chopped parsley
  • 1 teaspoon salt
  • 1 teaspoon ground black pepper 

Directions:
  1. Season both sides of the chicken with salt, pepper.
  2. Place a heavy pan on medium high heat and let it heat for 3 minutes. 
  3. Make sure there is no liquid left in the pan when you are ready to add oil, or it will burst, spatter and splash very vigorously and burn you. 
  4. Add the high smoke-point oil. Once the oil begins to creep around the pan, almost as if you can see the convective movements in action and oil forms wavy patterns. Add the chicken when the oil is ready and hot. Make sure you put it away from you so you don't burn yourself.
  5. When the browning is beginning, turn the heat to medium. It takes about 3 to 4 minutes to brown one side of chicken. Flip and cook another 3 to 4 min to brown. Then transfer the chicken to a plate and set aside. The chicken should be golden brown on both sides and the skin should be crispy. Let it rest in a warm spot while you make a pan sauce from the fond.
  6. Put the pan back on medium heat. Add 1 tablespoon butter and sliced mushrooms to it. Cook about 4 to 5 minutes.
  7. Add minced garlic and shallots and saute about 1 minute. 
  8. Add the wine to deglaze and scrape off the bottom of the pan. Add chicken stock to reinforce the chicken flavor. Add bay leave and thyme. Let it simmer and reduce until nearly dry (French term: A sec). Add cold butter or heavy cream to thicken and cook another 3 minute. The sauce should be thickened to coat the back of a spoon (French term: Nappé). Taste the sauce and season with salt, pepper to taste.
  9. Turn down the heat and add the chicken back in just to warm it up very briefly.
  10. Place the chicken on plate and spoon the sauce over it to serve, garnished with chopped parsley for the colorful presentation.

Notes:
  • This is a classic chicken dish with chicken breasts. You can cut the chicken breast to about 1 inch thick and saute-ing 3 to 4 minutes per side. Or pound the cutlets to about 1⁄4" thick before saute-ing 1 to 1 1/2 minutes per side to render them tender. 
  • You can dredge the chicken cutlet in 1/4 cup flour before cooking to make the skin more crispy.
  • Marsala wine originates from the Italian city of Marsala, which is in Sicily. It is similar to Spanish Sherry. It has a complex, slightly sweet flavor with a little acidity that makes it the perfect choice for this great chicken and mushroom dish. 
  • You don’t need to buy an expensive Marsala, but make sure it’s just regular Marsala wine, and not “Sweet Marsala” which is a desert wine and is too sweet for this dish. 
  • This same recipe can also be made the with Sherry or Madeira wine with very nice results.
  • Saute-ing is a high-heat method that requires plenty of heat in the thermal mass of the pan. A heavier pan retains more thermal mass than a lighter pan does. Well-seasoned cast-iron pans are great at retaining almost all the heat.
  • You also need a oil that has high smoke point, such as vegetable oil, peanut oil or canola oil. If you use olive oil, make sure it's the refined light or extra light olive oil that can tolerate high heat in saute-ing. However, you should never use olive oil for frying.
  • Meat should generally be cooked for 8 minutes per inch of thickness. 

Minestrone Soup!


When you have leftover vegetables in the refrigerator, the best way to get rid of them is to make a soup. Make sure you cut up the vegetables that can be easily scooped up with the spoon so you don't have to reach for your fork.

You can boil the tomato lightly, peel and seed to make a tomato concasse if you are serving this for guests and you want the presentation to look more appealing without the tomato skins and seeds floating around. Certainly you can use canned diced tomato to save time.

Ingredients (yield 2 - 3 servings):
  • 1 tablespoon olive oil
  • 1 large tomato, sliced
  • 1 clove of garlic, chopped
  • 1 zucchini, diced
  • 1 cup cut Swiss chard, (or thinly sliced)
  • 1/2 cup diced onion
  • 1/2 cup diced carrots
  • 1/2 cup button mushroom, diced
  • 1/2 cup cooked beans
  • 1/4 cup green beans, cut into inch-long pieces
  • 1/4 cup chopped parsley
  • 1/4 cup chopped basil
  • 1/2 tsp salt and 1/2 teaspoon ground black pepper to taste
  • 2 cups of water or stock
  • parmesan cheese

Directions:
  1. Heat a pan and add olive oil. Add onions, carrots and saute for 3 minutes until they browns. Add garlic to saute for 1 minute. Add the mushroom and cook for 1 minute.
  2. Add tomato and cook for 2 minutes until they soften. Add zucchini and water or stock. Bring to boil on high.
  3. Add half of chopped parsley, half of basil, and Swiss chard.
  4. Next you will add cooked beans. You don't add them at the beginning because they are already tender and you want them to remain a little crunchy. Adding them too soon will overcook them and make them mushy. 
  5. When it boils again, turn the heat off and add salt, pepper to taste.
  6. Serve with parmesan cheese, the rest of chopped parsley and basil.

Note: 
  • I often add cooked pasta, brown rice or cooked beans to make it into a meal. Add these before you add the cooked green beans.
  • You can also serve it with toasted rustic bread or baguette slices. 
  • Feel free to throw in celery, corns, potato or peas. 

Saturday, June 25, 2016

Fried Onion Two Ways!


Since I posted the Homemade Fried Shallots recipe, it's only natural that I should give you the fried onion counterpart version.

You can get store-bought Fried Onions, under the brand "French's Crispy Fried Onion" by Durkee, which was acquired by French's (a food manufacturer that also sells mustard, ketchup, a line of mayonnaise and Worcestershire sauce).

Remember, the "Fried Onions" (or sometimes "Fried Red Onions") that you found in Asian markets are not fried onions. They are fried shallots.

These are supposed to be fried until crispy and used as topping garnish (or garniture to be exact) and not the same as the onion rings as in an appetizer or side dish.

Ingredients (yield 5 cups):
  • 2 large onions, sliced into thin rings
  • 1 cup all-purpose flour
  • 1 cup Panko bread crumbs
  • 1-2 teaspoon kosher salt, or to taste
Only for option #1, oven fried:
  • Olive oil cooking spray
Only for option #2, deep fried:
  • 2 cups milk
  • more oil (for frying)
  • salt
Directions 
Option #1 (oven-fried):
Preheat oven to 450F.
  1. Preheat the oven to 425F.
  2. Line a baking sheet with aluminum foil and grease with cooking spray. Set aside.
  3. Sprinkle salt, flour and Panko bread crumbs on the onions and toss to coat evenly.
  4. Place the onion slices on the lined baking sheet in one single layer and spray with cooking oil generously.
  5. Bake for 20 minutes until golden brown. Take them out half-way through to flip and turn to the other side.
  6. Remove from oven and let them sit for 5 minutes, or until ready to use.

Option #2 (deep-fried):
  1. Firstly, soak onion slices in milk for 5 minutes. Drain
  2. Sprinkle salt, flour and Panko bread crumbs on the onions and toss to coat evenly.
  3. Heat up the oil on medium heat and add the sliced onions. Stir to keep them separate and fry evenly. 
  4. Turn the heat to medium-low and fry them until they turn pinkish and then golden brown.
  5. Remove the onions from oil and drain. Spread them on paper towel to further remove the excess oil. Season with more salt if desired.
  6. Let them sit 5 - 10 minutes to dry up and become crispy.
  7. Store them in an air tight container. They should be used in a few days.

Thursday, June 23, 2016

A Stewed Meat Sauce Dear to Heart!


Ru Lou Fan (Ragu Rice)
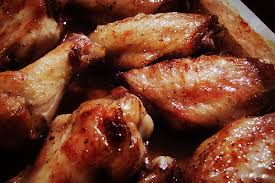
This is a very special recipe for a meat sauce that is dear to my heart and for people dear to me. It's a wildly popular indigenous local dish or condiment in Taiwan (called Lu Rou sauce). Think of it as a type of Ragu but with a different set of ingredients.

The sauce can turn anything plain into a heaven in mouth, no matter it's on steamed rice (Lu Rou rice), boiled noodle, vegetables, tofu, savory rice cakes, meat, seafood, even for sandwiches. It tastes even better the next day in terms of mouthfeel and flavor, when the collagen in the meat has completely broken down.

The key ingredient is "fried shallots" (what?) and to be authentic, this can not be substituted. (No, not even with fried onions, sorry.) If you can't find it, you can use fresh shallots, thinly slice them and deep fry, low and slow, until they turn golden brown (Homemade Fried Shallots).

The next important ingredients are dried shiitake mushrooms (what?) and dried shrimp (what?). If you really can't find these,  you could try fresh shiitake mushrooms but the flavor won't be as good and intense. Without the complex briny and fishy expression from dried shrimp, you can supplement with granulated seafood flavor powder or chicken broth powder, and replace water with chicken broth. However, the result won't be close. Natural flavors from real food are irreplaceable and unbeatable.

There are two key steps in the method. First is the browning process that employs caramelization and Maillard reaction to build up a good complex flavor foundation (more). Second is the low and slow, long cooking process that breaks down the collagen in the meat.

Remember this is not just a dish or entree, it is also used as a flavoring sauce so it is okay to err on the salty side. Use it on top of boiled leafy vegetables or blanched meat slices and you'll be pleasantly surprised.

Left to right: Dried shiitake, Dried shrimp skin, Fried Shallots,
Soaked dry shiitake mushrooms (diced), Soaked Dried Shrimp (chopped), Sliced fresh shallots, 


Ingredients (yield 8 servings):
  • 2 pounds of ground pork
  • 1/2 pound of ground beef (80% lean)
  • 1 cup fried shallots
  • 2 tablespoons dried shrimp, hydrated and minced (what?)
  • 5 dried shiitake mushrooms, hydrated and diced (what?)
  • two large shallots, finely chopped or sliced
  • 5 cloves of garlic, minced
  • dried shrimp skins 
  • 1 tablespoon peanut oil or vegetable oil
  • 1 cup soy sauce
  • 4 cups of water, or less, including soaking water from dried shiitake and dried shrimp
  • 1/2 cups of Shaoxing rice wine or regular rice wine
  • 30g Chinese rock sugar (what?) or 2 tablespoons of Turbinado sugar or granulated brown sugar
  • 1 tablespoon of white pepper powder
  • 1 teaspoon Chinese five-spice powder, optional 
  • 3 star anise or 1 teaspoon ground star anise powder, optional

Directions:
  1. Add 1/2 cup water to dried shiitake mushrooms to hydrate them for 1 hour until they soften. Cut into dices.
  2. Add 1/4 cup water to dried shrimps to hydrate them for at 10 min. Chop finely.
  3. Slice fresh shallots if you use them. 
  4. Put a heavy-bottom pot on medium high heat and add 1 tablespoon vegetable oil. Add fresh shallots and cook 7-8 min until you see the edges start to turn golden brown.
  5. Step #4 Step #5
  6. Add chopped dried shiitake and dried shrimp. Cook them on medium-high for 5-10 min until they start to turn brown, but don't let them burn.
  7. Add minced garlic and cook 1 min until fragrant. Don't let it burn as burnt garlic is bitter.
  8. Add ground pork and beef and brown the meat. Break up the meat into small pieces. You do not have to keep turning the meat. Let it sit and cook for 5 min so it can be browned. Then flip the bottom up and let other part hit the hot bottom to brown. Break up the meat as you go through this browning process.
  9. Step #6 Step #7
  10. Add 1 cup of fried shallots. Add the five-spice powder and ground star anise powder, if you use them. Stir in to make sure it is coated with the hot oil, and let it cook 5 min. 
  11. Add rice wine and keep stirring the meat, let it bubble and sizzle on medium high heat for 1-2 min. 
  12. Step #8 Step #9 and #10
  13. Then add soy sauce. If your heat is right, it should bubble and sizzle. Stir the soy sauce in with the meat. You want the soy sauce to coat the meat evenly and keep browning them together. Let it sit at the bottom for 4-5 min before turning, and toss up to brown everything evenly.
  14. Step #11 Step #12
  15. When you see the edges of the meat turn dark brown, should you add in the water and start the stewing process.
  16. Add water to cover the meat and stew for 1 hour. The sauce will get better and better as you reheat and cook even further. Tastes better the next day.
  17. Enjoy it on the rice and noodle and everything I've told you or not.

Notes:
  • Simplified key ingredient list:
    • ground pork
    • fried shallots
    • dried shiitake mushrooms
    • dried shrimp
    • soy sauce 
    • sugar (just a tad but could do without)
  • The browning process is important. Spend some time to do it well. 
  • Rock sugar can be found in Asian market. You could also substitute it with Turbinado sugar.
  • You can use 1-2 table of molasses to deepen the color and flavor.
  • Use Tamari soy sauce if you want it gluten free.
  • Serve with plain food will be the best way to let this sauce shine. Pair with pickled vegetable as a side dish to make it pop.
  • You can also add bean curds, tofu, boiled eggs into the sauce to stew. They will pick up the wonderful flavor. 
  • The white pepper powder has a herbal earthiness that is different form black pepper. If you don't have it, you can skip it but using black pepper isn't going to cut it. Instead, use chili pepper powder or cayenne.
  • You can add some red chili pepper flakes or dried chili pepper for the heat.
  • Top the sauce with white pepper and thinly chopped green onions when you serve.
  • You can mix in chili sauce for the kick when you serve.
  • You can use less water and make it dense and salty, freeze them and add water to thin it down when you re-heat it. 


Homemade Fried Shallots!


In Southeast Asia, they are used in sauces, soups, salads, meatballs, stews and as a garnish for their aroma, flavor and crunchy texture.

You can sprinkle them on burgers, casseroles, chickens, chops, fish, meat, baked potatoes, hot dogs, scrambled eggs, frittata or even a tuna tartare for extra complexity.

The trick is to start the frying process in cold oil and cook them slowly.

The shallots will keep, stored in an airtight container, for 1 day, but they're best the day they are made. Strain the oil you used to fry the shallots and use it in other recipes or to fry more shallots. The strained oil, called shallot oil, will keep, refrigerated, for several weeks.

Ingredients:
  • 1 cups thinly sliced shallots (about 2 large shallots)
  • 1 cups canola oil

Directions:
Option 1:
  1. In a small saucepan, add oil, shallots and place the pan over medium heat. 
  2. Cook gently, stirring occasionally, for about 12-15 minutes (turn down the heat if they seem to be coloring too quickly), until they gradually become golden. 
  3. They will continue to cook and darken out of the hot oil, so you should strain them when they are a few shades lighter than the perfect color or doneness.
  4. Place a sieve over a bowl and drain the fried shallots. Transfer the shallots to a paper towel-lined plate to further remove the excess oil. 
  5. Put them in an airtight container to store for 1 day.
Option 2 (if you make more batches and have a deep-fry thermometer):
  1. In a small saucepan, add oil, shallots and place pot over medium heat. 
  2. Cook gently, stirring occasionally, for about 10 minutes (turn down heat if they seem to be coloring too quickly), until they gradually become golden. 
  3. The oil should register around 275°F on a deep-fry thermometer. 
  4. Drain the fried shallots when they turn golden. Transfer the shallots to a paper towel-lined plate to drain and remove the excess oil further.
  5. To make them extra crunchy, increase the heat to high. When the oil registers 325°F on the deep-fry thermometer, add the once fried shallots and cook just 1-2 seconds until they are crispy and well-browned, watching carefully so the shallots don't burn. Remove shallots with the wire sieve to stop the cooking, and transfer them to a paper towel-lined plate to drain. 
  6. Use them within a day.

Tuesday, June 21, 2016

My Mapo Tofu!


This is my go-to dish when I don't know what to cook for dinner. I love having this with steamed rice. Enjoy!

Ingredients:
  • 1/2 pound of ground pork or beef (I use equal parts of pork and beef)
  • 1 1/2 cups of chicken broth or water
  • 4 cloves of garlic, minced
  • 2 scallions chopped
  • 1 teaspoon minced ginger
  • 1 box of soft tofu or medium firm tofu, drained and diced
  • 2 tablespoons of Fermented broad bean paste (dou-ban-jiang) (I use the plain version, no heat. Check here if you need help.)
  • 2 teaspoons of hot chili sauce, or 1 teaspoon chopped dried red chili pepper
  • 1 tablespoon soy sauce
  • 1 tablespoon rice wine or mirin (Japanese sweet rice wine).
  • 2-3 teaspoons sugar
  • Sichuan Pepper
  • 2 teaspoons of oyster sauce (or replace by another tablespoon of soy sauce)
  • 1 teaspoon ground Sichuan pepper 
  • 1 teaspoon ground white pepper
  • 1 teaspoon red chili pepper flakes
  • 1 teaspoon sesame oil
  • Slurry: 2 teaspoons of cornstarch and 1 1/2 tablespoon of water
  • one tablespoon peanut oil or vegetable oil

Directions:
  1. Mince garlic, ginger and scallions. Drain and dice tofu block (Tofu Types).
  2. Heat up a heavy bottom skillet with one tablespoon of oil and put the ground meat (pork and/or beef) to brown on medium-high heat. Cook about 7-10 minutes. 
  3. Add minced ginger, garlic and half of scallions. Toast until they are aromatic. Cook about 5-7 minutes.
  4. Turn the heat to medium and add fermented bean paste (Dou-ban-jiang) and chili sauce. Saute fro 5 minutes until it is almost dried up and almost begin to stick to pan. 
  5. Add soy sauce. Cook another 2-3 minutes.
  6. Add the cooking wine or mirin. Cook for 2-3 minutes.
  7. Add oyster sauce and sugar. Stir to mix in. Add 1 1/2 cups of chicken broth or water, Sichuan pepper and red chili flakes. Bring to a simmer.
  8. Add tofu dices and gentle stir in to submerge the tofu in the liquid. Cook for 8-10 minutes.
  9. Mix cornstarch and water to make slurry. Add it to the liquid to thicken the sauce. Bring to boil again and turn the heat off. Add the rest of chopped scallions, white pepper and sesame oil. Mix up.
  10. Transfer to plate or deep dish. Garnish with chopped green part of scallions. Serve with steamed rice.

Note: 

  • Even if you don't have all the items, you can still make it. 
  • Simplified key ingredients:
    • Ground pork or beef
    • Tofu (duh...)
    • Garlic (if you really don't have ginger or green onions on hand, you can skip those)
    • Fermented bean paste
    • Soy sauce
    • Sugar
  • When you have fewer ingredients, you have to work a tad harder to pump up the flavor base. (We're talking about 5-10 more minutes effort, not so bad.) I will tell you more about it later.
  • Skip the hot chili sauce if you can't take heat or if you use the spicy version of the bean paste (La-dou-ban-jiang).


Sunday, June 19, 2016

How to Make Clarified Butter.


Clarified butter is a butter that has been melted and separated into butter fat, butter milk, and milk solids. The buttermilk and milk solids burn more easily (at about 300F and 150C) and are removed to produce the remaining clear butter fat that can tolerate higher heat (about 450F and 230C).

It could take a few hours to make clarified butter, just letting it simmer very gently on the stove. A few hours later, it will be separated into clear fat with the white foam on the top and the butter milk at the bottom.

Directions:
  1. Cut the butter into cubes and place them in the saucepan. 
  2. Melt the butter over a very low flame. It will foam, bubble, and it will start to separate into its components, with the milk solids floating on the top and the butter milk on the bottom.
  3. Once the butter starts to separate, you can skim the milk solids off of the top and continue to cook it over a very slow, gentle low heat. As it continues to cook, it will separate even more.
  4. Ultimately the butter will be almost clear and it is pure fat.
  5. You can use the clarified butter for stir-fry or as a topping.

Note:
  • Do not replace regular butter with clarified butter in your recipes unless it calls for it specifically. Since regular butter contains 16-17% water that has been removed from clarified butter, it's going to throw the proportions of your baking recipes off. 
  • Ghee is not the same as clarified butter. It's often used in Indian dishes and is heated just a wee bit more on medium heat, until the milk solids are browned, giving the resulting fat a nutty flavor, richer aroma and a very high smoke point. (more)
  • The butter milk and milk solids in regular butter start to burn above 250F-300F (about 150C). Clarified butter has a higher smoke point (around 450F and 230C) for high heat cooking. 

Easy Oven-Roast Chicken Drumstick.


You could use this recipe for chicken thighs or chicken quarter legs as well. It's an easy and low maintenance recipe with the minimum care. (Yeah, just like the stewed chicken drumsticks dish.)

Ingredients:
  • Three chicken drumsticks or thighs, or two quarter leg.
Dry rub mix:
  • salt, pepper to season
  • 2 teaspoon brown sugar, optional
  • 1 teaspoon onion powder, optional
  • 1 teaspoon cayenne pepper or paprika, optional
  • 1/2 teaspoon Chinese five spice powder, optional
Sauce option 1:
  • Your favorite barbecue sauce or Asian Char Siu Sauce. 
Sauce option 2 (Fusion BBQ sauce):
  • 3 tablespoons honey or maltose (or brown sugar)
  • 2 tablespoons soy sauce
  • 2 tablespoons ketchup
  • 2 tablespoons Dijon mustard
  • 2 tablespoons rice vinegar or Worcestershire sauce
  • 2 teaspoons sambal chili sauce
  • 1/2 teaspoon Chinese five spice powder
Sauce option 3 (Asian BBQ sauce):
  • 1/3 cup hoisin sauce
  • 1/4 cup honey, cane syrup, maltose or brown sugar
  • 1/4 cup soy sauce
  • 4 tablespoons of dry sherry or Chinese ShaoHsin cooking wine 
  • 2 teaspoons  Red chili pepper flakes
  • 1 teaspoon Chinese five spice powder
  • 1 tablespoon minced ginger, optional
Sauce option 4: Try my barbecue sauce recipe!

Directions:
  1. You could cut into the drumsticks (or thighs, legs) at the thickest part so the flavor can get inside the chicken.
  2. Rinse the chicken. Line a rimed baking sheet with foil so you don't have to clean up the greasy sticky mess afterwards.
  3. Mix together all the ingredients in dry rub.
  4. Rub the salt and pepper, or dry rub mix all over the chickens.
  5. Bake in a 375F degree pre-heated oven for 20 minutes.
  6. Remove the pan from the oven and brush the chicken with the sauce of your choice. Turn each chicken over and return to the oven to bake for 10 more minutes. 
  7. Test the chicken with a fork. The fork should go through to the bone with a little resistance. Or cut through the thickest part close to the bone to check if the fluid/juices run clear. 
  8. Serve with chopped green onions and/or sesame seeds on steamed rice. 

Notes:
  • This can be served with baked potatoes. However since you're baking the chicken, I suppose it is more efficient if you cook your carbs some other way, such as boiling (pilaf, pasta, rice or noodles) or steaming (rice). You certainly could serve it with fried rice.
  • You can grill the chicken outdoors.
  • You can use the sauce for pork or shrimps.

Easy Chicken Drumstick Stew.


You could use this recipe for chicken thighs or chicken quarter legs. It's an easy and low maintenance recipe with the minimum care. It serves well with steamed rice. You can also cook Chinese noodles or Udon noodles and season with the cooking sauce to go with the chicken.

However, it is important to set the timer and remove the chicken on time so your chicken won't be overcooked. Total cooking time should be around 15 to 20 minutes.

Ingredients:
  • Three chicken drumsticks or thighs, or one quarter leg.
  • 3 cups of water
  • pinch of salt, pepper to season
Sauce option 1:
  • 1/2 medium onion, sliced
  • 2 tablespoons of soy sauce
  • 1 tablespoons of sugar
  • Two teaspoon sesame oil
Sauce option 2:
  • 1/2 medium onion, sliced
  • 2 green onion, cut into sticks
  • 2 red chili pepper, sliced
  • 4 slices of ginger
  • Two teaspoon soy sauce
  • Two teaspoon sugar
  • Two teaspoon sesame oil
  • One tablespoon dried hot chili pepper (or one teaspoon red chili pepper flakes), optional depending on your preference for heat)
Sauce option 3:
  • All items in sauce option 2
  • 1/4 teaspoon of ground white pepper
  • one teaspoon of Chinese fermented bean paste (dou-ban-jiang) or one teaspoon of oyster sauce (what?)
Directions:
Option 1 (Easy):
  1. You could cut into the drumstick at the thickest part so the flavor can get into the flesh.
  2. Rinse the chicken. If you have time, parboil the chicken in boiling water for 1 min to get rid of blood and scums. Rinse in cold water.
  3. Put the chicken, onion slices, green onions, red chili pepper, ginger slices, all seasonings and water into pot. The water should cover the chicken. Taste the sauce and add salt to adjust. It should taste like a dipping sauce.
  4. Bring to boil on high heat and turn to low heat, cover to simmer gently for 10 min. 
  5. Turn the heat off but do not remove the cover. Let it sit in the pot for 10 min.
  6. Serve with chopped green onions and/or sesame seeds. 
Option 2:
  1. Rinse the chicken.
  2. Heat up the pan or pot and add 1 teaspoon of sesame oil. Add the chicken skin side down. Cook 5-6 min to brown. Flip to the other side and add green onions, ginger, onions and red chili pepper to brown. Cook another 5 min. 
  3. Add all seasonings and water. Make sure the water covers the chicken. Taste the sauce and add salt to adjust. It should taste like a dipping sauce. 
  4. Bring to a boil on high and turn to low heat. 
  5. Cover with lid and simmer 5 min and turn the heat off.
  6. Let it sit for 5 min covered. 
  7. Serve with chopped green onions  and/or sesame seeds. 

Notes:
  • The procedure is a basic stewing process (a moist-heat cooking method).
  • You can vary the sauce with this same process and enjoy chicken thighs/drumsticks/legs in many different flavors.
  • You can replace ginger with garlics (about 3-4 cloves, preferably sliced). 
  • Don't toss away the cooking liquid. Add bean curds, kombu (soaked to soften), tofu, boiled eggs to make stewed side dishes. Or use the liquid to make salad dressing.


Monday, June 13, 2016

Chicken Adobo With a Touch.


Chicken Adobo, which is originated from Spain and the name was given to an indigenous Philippine dish by Spanish colonists.

Ingredients:
  • 12 chicken drumsticks or chicken thigh
  • 4 garlic cloves, chopped
  • 2 dried bay leaves
  • 2 cups chicken broth
  • 3/4 cup white wine vinegar
  • 3/4 cup soy sauce
  • 1/4 cup vegetable oil
  • 3 tablespoons of arrowroot or cornstarch
  • 2 to 3 tablespoons of lime juice from 2 large limes
  • 2 tablespoons of chopped flat-leaf parsley or cilantro
  • 1/2 cup light brown sugar
  • 1 teaspoon crushed red pepper flakes
  • lime wedges
  • kosher salt and ground black pepper to season

Directions:
  1. Season the chicken with salt and pepper. 
  2. Combine the chicken garlic, vinegar, soy sauce, sugar, red pepper flakes, and broth until mixed well.
  3. Heat up the oil over medium-high heat in a skillet. Put the chicken in the hot pan and cook 5 min to brown on all sides.
  4. Add the vinegar, soy sauce mixture and the bay leaves in the pan with browned chicken and bring to a boil. Use a spoon to scrape the fond (brown bits) at the bottom of the pan. 
  5. Reduce the heat and simmer for 30 min. Turn the chicken half through.
  6. Transfer the chicken to a plate. 
  7. Mix the arrowroot (or cornstarch) with lime juice and add that into the pan with the liquid. Bring to a boil. cook 5 - 10 min to thicken the liquid.
  8. Season to taste with salt and pepper.
  9. Garnish the chicken with chopped parsley or cilantro.
  10. Serve the chicken with the sauce on top, or on the side, together with the lime wedges. 
Note:
  • Adobo means "marinade" in Spanish. There is also Portuguese version of it and thus is common in South American dishes.

Sunday, June 12, 2016

Creamy Black Sesame Seed Hot Cereal! Three Ways!


It's a traditional Chinese hot cereal (or porridge) made of rice and roasted black sesame seeds, that can be spotted on a dim sum (點心) menu. If you need something warm in the morning other than coffee, this is a great choice especially if you use whole grains. Prepare it the night before and put in the refrigerator. Heat up in the microwave in the morning, dump it into the thermo and off you go.

Ingredients (yield one servings): 
Option 1:
  • 1/4 to 1/3 cups of ground black sesame seeds
  • 3/4 cups of water 
  • 2 teaspoons of uncooked short grain white rice
  • 1 to 2 tablespoons of honey or sugar
  • pinch of salt
Option 2:
  • 1/4 to 1/3 cups of ground black sesame seeds
  • 1/2 cups of water 
  • 30 grams (about 1/3 to 1/2 cup, loosely unpacked) of steamed short grain white rice
  • 1 to 2 tablespoons of honey or sugar
  • pinch of salt
Option 3:
  • 25 grams of roasted black sesame seeds
  • 3/4 cups of water 
  • 8 grams of rice flour (about 1 plus teaspoons)
  • 1 to 2 tablespoons of honey or sugar
  • pinch of salt

Directions:
I use option#1 but I list the proportions in option#2 and #3, depending on what you can find in your pantry or neighborhood markets.

Option 1:
  1. Rinse the raw rice and place that with water in a small sauce pan. Cook it for 20 min. When it's done, let it sit for 30 - 60 min and it will thicken up further.
  2. Combine ground black sesame seed meal and rice porridge. Transfer the mixture to blender or food processor. Pulse 10 second for three to four rounds. It should be pretty smooth.
  3. Place the mixture and salt in a small sauce pan on medium-low heat. Bring to a gentle simmer. Stir the honey or sugar in until dissolved. Let it cool for 10 min. You can also process this last stage cook in the microwave. Cook on high (1200W) for 1-2 minutes. Check the doneness. Repeat to cook at 30 second intervals if necessary.
  4. Serve or keep refrigerated until ready to serve. 

Option 2:
  1. Mix the cooked rice with water and cook for 20 min. Let it sit for 20-30 min to cool down and thicken up.
  2. Combine ground black sesame seed meal and rice porridge. Transfer the mixture to blender or food processor. Pulse 10 second for three to four rounds. It should be pretty smooth.
  3. Place the mixture and salt in a small sauce pan on medium-low heat. Bring to a gentle simmer. Stir the honey or sugar in until dissolved. Let it cool for 10 min. You can also process this last stage cook in the microwave. Cook on high (1200W) for 1-2 minutes. Check the doneness. Repeat to cook at 30 second intervals if necessary.
  4. Serve or keep refrigerated until ready to serve. 

Option 3:
  1. If you use whole black sesame seeds, grind them in coffee grinder for the best result. Or add the water and pulse in a blender. You can use ground black sesame seed meal as above and make it even easier.
  2. Mix the rice flour with black sesame seed water mixture evenly. 
  3. Place the mixture and salt in a small sauce pan on medium-low heat. Bring to a gentle simmer. Stir the honey or sugar in until dissolved. Let it cool for 10 min. You can also process this last stage cook in the microwave. Cook on high (1200W) for 2 minutes. Check the doneness. Repeat to cook at 1 minute intervals if necessary.
  4. Serve or keep refrigerated until ready to serve. 

Note:
  • If you use whole white sesame seeds, toasted it at 325F for 10 min. Put in blender with water and pulse until smooth. Pass through fine mesh strainer to remove bigger pieces before mixing with rice. 
  • As a variation for option#3, you can just mix up everything and cook in a small saucepan for 20 min. Add sugar and salt. That's it. 
  • If you are a member of our one-knife-one-pot club, use the ground black sesame seed powder and you don't have to blend-pulse it. It tastes just as good with the rice porridge. 
  • Use whole grains to replace refined rice. I use brown rice, steel cut oatmeal, and other whole grains to replace white rice, topped off with chia seeds, cooked quinoa, amaranth or millet. Will provide my recipe later. 
  • To cook quinoa, use one part quinoa and 2 parts of water. Cook 20 minutes, let it sit for 10 minutes covered in steam. Then fluff with fork. 
  • Grains like quinoa, amaranth, millet, buckwheat, teff, bulgar, spelt, kamut or khorasan, sorghum have low GI, low or no glutton, higher level of protein and nutrients, and are more environment-friendly. In general they are easier to grow in tougher climate and soil conditions than rice or wheat, so they are better for you and your planet. I really have to tell you more about them later. 
  • Instant package usually contains too much sugar and starchy thickening agent. As you can see here, it's not hard at all to make it at home.


Saturday, June 11, 2016

Simple Tomato and Ham Soup!


This soup is what I made out of the chicken bones, removed from the chicken breast (my homemade chicken breast sandwich meat). I had some sandwich ham from last week so I threw that in.

When use the sandwich ham or the cooked chicken breast slices to pump up the protein, don't put in too early and overcook them. Add them lastly after everything else is fully cooked to your desired doneness.

There are many vegetables that can add natural savory flavors to your soups or dishes. (I will talk about that later.) Tomato is one of them. The dried Chinese yam and longan also help to bring more complexity to the result, with a touch of sweetness.

The soup is infused with all the natural flavors released from the ingredients that I add no other seasoning to my soup, but if you like it, season away with some salt.

Ingredients (yield 2 servings):
  • 1 cup of cut or diced tomatoes
  • three longan pulp or with pit (out of shell)
  • 3 to 4 pieces of dried Chinese yam (huai shan, what?), rinsed and drained
  • one scallion, cut to short sticks
  • 1/4 cup enoki mushrooms, cut into shorter strips
  • 3 cups of water
  • 2 teaspoon of goji berries, rinsed
  • 1 slice of ham.
  • salt to season (optional)
  • ground white pepper (optional)
  • chopped scallions (or green onions) to garnish

Directions:
  1. Place tomatoes, longan, dried Chinese yam, scallion sticks, enoki mushrooms and water in a soup pot. Bring to boil and cook at least for 30-40 minute. I cooked for 1 hour. 
  2. Lastly, put in your ham or chicken to warm up before serving. 
  3. Put the rinsed goji berries in. At this point you can turn the heat off and let it seep for 5 min.
  4. Serve with chopped green onions and ground white pepper. 
  5. Season with salt if desired. 

Friday, June 10, 2016

Garlic Detox Tofu Soup!


Ingredients (yielding one serving):
  • 1 1/2 cup of water
  • 1/4 cup green bell pepper sliced (about 1/2 bell pepper)
  • 1/4 cup sliced shiitake mushroom from one mushroom
  • 1/4 cup thinly sliced daikon turnip
  • 1/3 cup diced tofu (about 1/8 of a block from the box, or 30 grams)
  • 1/2 teaspoon minced garlic
  • 1 teaspoon soy sauce
  • 1 teaspoon cornstarch and 1 tablespoon water to make slurry

Directions:
  1. Thinly slice green bell pepper, daikon turnip and shiitake mushroom. Dice tofu.
  2. Mix 1 teaspoon in 1 tablespoon of water. 
  3. Place shiitake mushrooms, tofu, daikon, soy sauce, garlic and water in small soup pot and bring to a boil.
  4. Cook for 10 min, and add the green bell pepper. Add the cornstarch mixture to thicken. Bring back to boil again, stir to mix evenly and turn the heat off. 
  5. Serve with some ground white pepper. 
  6. Season with more salt if desired.

Miso Detox Soup!

Ginger is great to warm you up and promote circulation.

Ingredients (yield one serving):
  • 1 cup onion (about 30g), sliced
  • 1 cup cabbabe leave (about 50g) cut up
  • two shiitake mushrooms (about 40g) sliced
  • 1/2 cup water
  • 1/2 cup unsweetened soy milk or almond milk
  • 1/2 tbsp miso (preferably white miso)
  • 1 tsp minced ginger
  • chopped scallions or green onions (optional)
Directions:
  1. Put ginger, vegetables and water in a small soup pan. Bring to a boil and turn to low heat. Simmer 4~5 min until the vegetables are softened.
  2. Add soy milk or almond milk, miso and keep stirring until all are mixed evenly. 
  3. Turn the heat off. Serve with chopped green onions.
Note:

  • Feel free to add tofu dices (about 1/4 cup).
  • Feel free to add some wakame seaweed.

Basic Detox Soup!


This soup is high in potassium and fibers that can help reduce water retention and alleviate constipation problems.

Ingredients:
  • equal part of the following vegetables:
    • 1 cup of cut or diced daikon or white turnip
    • 1 cup of cut or diced shiitake mushrooms
    • 1 cup of cut or diced tomatoes
    • 1 cup of cut or diced onions
    • 1 cup of cut or diced cabbage
  • 5 cups of water
  • salt to season (optional)

Directions:
  1. Place all ingredients in a soup pot with water. Bring to boil and cook for 10-15 minute if you prefer the vegetables to remain crunchy, or cook for 30-40 min if you prefer them tender.
  2. Use salt sparingly especially if you try to reduce water retention.

Thursday, June 9, 2016

Chocolate Mochi!


Ingredients (yield 8-10 servings):
  • 115g glutinous rice or sweet rice flour (about 1 1/2 cup)
  • 1 cup water and 1/3 cup 
  • 2/3 cup sugar
  • 1 tablespoon cocoa powder
  • 1/4 cup cocoa powder or cornstarch for dusting
  • pinch of salt

Directions:
  1. Mix sugar, cocoa powder and 1/3 cup of water in a saucepan. Heat up to dissolve sugar. 
  2. Mix sweet rice flour with 1 cup of water until smooth. Cover and microwave 1 1/2 minute on high. Remove from oven and mix until. Cover and microwave another 1 minute on high. 
  3. Remove cooked rice flour dough from oven. It should be cooked and translucent. If not, return to oven and cook another 30 seconds.
  4. Add cocoa syrup mixture to cooked dough while it's still hot. Mix until they mix evenly and smooth. 
  5. Spread out the dough into a greased pan. Let it cool and it will firm up. Dust top with cocoa powder and transfer to a cutting board. cut into 8 to 10 pieces.
  6. Use plastic wrap to help kneading it into a round disc shape. 
  7. Dust with more cocoa powder or cornstarch and serve. 
Note
  • To make this as a wrapper like my other post (Adzuki Bean Paste and Strawberry Mochi), reduce the water to 3/4 cup to make the consistency firmer so it can hold up better around the fillings.
  • The fillings can be ice cream, frozen Greek yogurt, diced soft fruits, lotus seed paste, sesame seed paste, chocolate ganache (or so-called chocolate paste), or other nut paste, you name it.
  • If you use ice cream or frozen Greek yogurt as fillings, make sure to freeze it for 30 min before serving.

Homemade Chicken Breast for Sandwiches.


I like buying chicken or pork with bones because the bones are the flavor bombs. They are the reasons for broth and stock to be the flavor foundation for every savory dish. Foodies know the meat next to bones are the tastiest part of the whole.

I buy the bone-in skin-in chicken and cook them with bones and skin for the flavor. Then I remove the skin and separate the bones from the flesh. Collect those bones and make broth with vegetables. Here is how.

I placed a 8 3/4 inch chopstick along each side of the chicken in the picture. The left piece is around 18 ounces and the piece on the right is 15 ounces, just to give you an idea.

Ingredients:
  • Chicken breasts about 17 to 18 ounces and 2 inch thick each piece with skin on and rib cage bones. (To save time, you can use boneless and skinless chicken breast but the cooking time needs to cut back 4-8 min.)
  • 1 1/2 tablespoons salt
  • 2 teaspoons sugar
  • 1 quart of water to cook chicken
  • Formula for brine (for 1 days):
    • 1 tablespoon sea salt
    • 2 teaspoon sugar
    • 1 quart (4 cups) of water
Directions:
  1. If you choose to brine, use the formula above and brine in the refrigerator for at least one day, up to two days. Mix salt and sugar in water and submerge chicken breasts in it. Leave in the refrigerator for 24 hours. 
  2. Take the chicken breasts out of refrigerator and drain the brine liquid. Rinse the chicken breasts. If you don't want to cook with the skin, you can remove it. 
  3. Heat up 1 quart of water with 1 1/2 tablespoon sea salt, 2 teaspoons sugar and bring to a boil.
  4. Put the chicken breasts in. For 1 quart of water, you can fit 2 pieces. Bring to a boil on high. Turn to low heat as soon as it starts to boil. Cover and simmer for 16 minutes and turn the heat off. If you have an electric stovetop, make sure to turn heat off early, around 14 to 15 min as it will take sometime for the stove to respond and to cool. I turn my electric stove off around 15 min. (If you find your chicken breasts on the grainy side, adjust the cooking time and turn the heat off earlier next time.)
  5. Put the lid on and keep it covered. Let it sit there in the hot water for 10 min to 12 min. Check after 10 min with one chopstick or a fork. You need to be able to stick it through the cooked flesh with a little resistance. If you can't stick it pass the center, let it sit there covered for another 5 to 10 minutes and check with fork again.
  6. Transfer the chicken breasts to the plate and let it cool completely before cutting. 
  7. At this point, if I cook more, I'll freeze some pieces after removing the skin and bones for later use. This will effect the texture a little but saves me time.
  8. Remove skin and bones. Toss away skin but keep the bones to cook in soups.
  9. Slice chicken into slices for sandwiches or soups.

Note:
  • Why do I make my own while it's so convenient to get it from the supermarket? I don't like what they add in there to prolong the shelf life, neither the amount of sugar they use in it. I like my chicken to taste like chicken with just enough salt.
  • Chicken breasts can be really dry and grainy when overcooked. The solution is to brine them to keep them moist at the cost of some flavor. Use less salt (2 teaspoons) if you are to leave it for 2 days.
  • I don't brine my chicken as I like full chicken flavor but I watch the cooking time closely to make sure it's not overcooked.
  • You can choose to dry-brine (aka extended salting). Rub one to two teaspoons of salt all over chicken breast and leave it in the refrigerator overnight. Rinse when you're ready to cook it.
  • Cook time is about 7-8 min per inch of meat in simmering water plus 10 min leaving in hot water after the heat is turned off. 
  • For a 16 ounce skinless boneless chicken breast, cook 8 minutes per inch and leave it in hot water covered for 10 minute.
  • Always let cooked meat rest before cutting or the juice will run out and the meat will be dry.

Wednesday, June 8, 2016

Homemade Mayonnaise - Cheaper and More Delicious!


The good thing about making your mayo is that you could use good high quality olive oil that is good for your health.

Ingredients (yield about 2 cups): 

  • 1 cup olive oil
  • 1/2 cup vegetable oil 
  • 2 egg yolks
  • 1 tablespoon white wine vinegar
  • 1 tablespoon fresh lemon juice from half of a lemon
  • 1 teaspoon Dijon mustard
  • 3/4 teaspoon salt
  • 1/8 teaspoon sugar
  • pinch of black pepper

Directions:
  1. Dump the egg yolks into a tall container, a mason jar, or the beaker that comes with the stick blender (immersion hand blender). Add lemon juice, white wine vinegar, salt, sugar, Dijon mustard into egg yolk. Top with a cup of olive oil and 1/2 cup vegetable oil. Let it settle for 10 second.
  2. Stick the hand blender to the very bottom of the container or beaker. Start very gentle and slow and just pulse 5 second to begin with. Pulse slowly at 5 second intervals until you see the white thick cloudy emulsion starts to form from the bottom after the first 10 to 20 seconds. Then move the blender around to whip the whole thing into thick mayo.
  3. Just a few second and voila! There you have your homemade mayonnaise.

Note:
  • This recipe is on the tangy side. If you like a sweeter mayo, reduce the wine vinegar to 2 teaspoons. 
  • You can also make it in the food processor following the same drill.

Herb Mayonnaise.


Ingredients (yield 1 cup):
  • 1 cup mayonnaise (how to homemade healthier version)
  • 4 fresh basil leaves
  • 2 tablespoons of fresh dill
  • 2 tablespoons of fresh flat-leaf parsley
  • 1 tablespoon lemon juice
  • Sea salt and ground black pepper to season
Directions:
  1. Combine the mayonnaise, parsley, dill, lemon juice, basil, salt, and pepper in a blender and pulse at 5 second intervals until the mayonnaise is smooth and green.
  2. Serve or refrigerate in an airtight container for up to one week.

Cucumber Tea Sandwiches.


These make a nice hors d'oeuvre as well as light snack or lunch on a hot day.

Ingredients (yield 4 dozens): 
  • 24 thin slices whole wheat sandwich bread
  • 1 cup arugula or watercress or both, rinsed, drained
  • one cucumber, peeled and thinly sliced
  • 1/2 cup olive oil mayonnaise or homemade mayonnaise (Try my Homemade Mayonnaise or my Herb Mayonnaise)
  • 1/4 cup finely chopped fresh flat-leaf parsley or roasted seaweed.
  • 1/4 teaspoon of sea salt 
  • ground black pepper to season

Directions:
  1. Rinse arugula or watercress and drain. Remove the tough stems.
  2. Season the cucumber slices with salt and pepper and toss to coat evenly.
  3. Spread a layer of mayonnaise on one side of each sandwich bread and arrange the cucumber slices in one even layer on two-thirds of the bread. Place the arugula or watercress on top of the cucumbers. 
  4. Beginning from the side with cucumbers and roll up. Seal with mayonnaise and use toothpick to hold the roll. Or wrap with plastic wrapper and tighten on both ends. Let it set in the refrigerator for 20 min before slicing at an angle.
  5. Spread a small amount of mayonnaise along the cut side and dip the edges of that side into the chopped parsley or seaweed.
  6. Transfer to a platter. Serve immediately or cover tightly with plastic wrap and refrigerate until ready to serve. Finish in 1 hour for best flavor.
Note:

Sandwich variations for appetizers: 
    • Bacon, Lettuce and Tomato (BLT) with avocado and watercress (or arugula).
    • Salami, butter and aged Gouda.
    • Smoked salmon, cucumbers and plain Greek yogurt (or creme fraiche, or cream cheese).
    • Fresh goat cheese with sun-dried tomatos and arugula.
    • Grilled zucchini, fresh mozzarella cheese and balsamic vinaigrette.
    • Smoked turkey or chicken breast with curried mayonnaise on walnut raisin bread.


Raspberry Sauce.


Ingredients (yield one cup):
  • 1 pint fresh raspberries
  • 1 cup honey or sugar
  • 2 tablespoon raspberry liqueur (framboise) or orange liqueur
  • crated orange zest and juice from one orange
  • pinch of salt

Directions:
  1. Combine raspberries, honey (or sugar), liqueur, and orange zest and juice in a small saucepan and put on medium-high heat. Bring to a boil and reduce the heat to simmer for 5 minutes until the sauce is thickened slightly. Add a pinch of salt and mix well.
  2. Pass the sauce through a fine-mesh strainer. Toss away the solids. 
  3. Serve immediately or cover and keep in the refrigerator until ready to use.

    Note:
    • Chambord raspberry liqueur is a common one at most liquor stores and is more expensive.
    • Mathilde raspberry liqueur is a less expensive option among others.
    • Some fruit liqueurs are candy sweet or cough syrupy. Making your own liqueur (Raspberry Liqueur Recipe) gives you control over the end result in terms of sweetness and alcohol level.

    Tuesday, June 7, 2016

    Homemade Raspberry Liqueur.


    Ingredients:
    • 12 ounces raspberries (about 2 1/2 cups)
    • 1 cups gin, vodka or a red wine with a fruity note 
    • 2/3 cup brandy (or use the same vodka)
    • 1 cup sugar
    Directions:
    • Rinse raspberries and place in a container that comes with a tight lid. Mash and crush to break them up. Add vodka, (or wine), brandy, vanilla and sugar. Cover tightly with lid and shake well. Keep in cool place for 1 month.
    Note:

    • Don't use full-body red wine with too much tannin that may be too overpowering. Try light body low acidity red wines that are herbal, fruity and bright. You could try to make it with crisp, flowery and fruity white wines.
    • Add lemon zest, vanilla, orange, honey, black currant to add more flavor and complexity.

    My Dark Chocolate Pudding.

    It can be serve chilled but I like it best when it's still slightly warm.

    Ingredients (yield six servings):
    • 1 cup of plain yogurt and 1 cup of whole milk (or 2 cups of heavy cream for full flavor)
    • six ounces of bittersweet chocolate, finely chopped (See notes on my Chocolate Sauce)
    • four large egg yolks, lightly beaten
    • 1/4 cup of maple syrup or 3 tablespoons of sugar
    • 2 tablespoon vanilla extract
    • pinch of salt
    • some whipped cream (or frozen yogurt, ice cream, optional)
    • some dark chocolate shavings (optional)

    Directions:
    1. Preheat the oven to 325F. 
    2. Melt the chocolate with 1/2 cup of whole milk in the top of a double boiler (what?) over medium-low heat and stir occasionally until the mixture is smooth.
    3. Place the remaining 1/2 cup of whole milk and 1 cup of plain yogurt in a small saucepan, and bring to a simmer over low heat. stir occasionally until it's a little scalded with a light skin formed on top. 
    4. Stir in the maple syrup or sugar and pinch of salt and remove the saucepan from the heat.
    5. Add the hot mixture to chocolate mixture. Whisk until smoothly combined.
    6. Slowly whisk the egg yolks into the mixture and return it to the double boiler. Cook it over low heat and stir constantly for 3 to 5 minutes.
    7. Pour the pudding mixture into six individual small baking dishes or ramekins. Cover each bowls with foil and bake the puddings for 15 to 18 minutes until the edges are slightly firm but the centers are soft and jiggly when you shake the pan. .
    8. Uncover the puddings and place them on a rack to cool. 
    9. Cool for at least 60 minutes.
    10. Served warm. Or cover and put into the refrigerator to chill after it's cooled completely.
    11. Serve with a dollop of whipped cream, frozen yogurt, frozen Greek yogurt, or ice cream.
    Note
    • A double boiler is the same as using a metal bowl over, but not touching, a smaller pot with simmering water.
    • Serves with cherries, raspberries and roasted nuts, like pistachios. 

    My Warm Dark Chocolate Sauce.


    Ingredients:
    • 1/2 cup plain yogurt and 1/2 cup whole milk (or 1 cup heavy cream for fuller flavor)
    • 1/2 cup dark maple syrup
    • 10 ounces of 60 percent plus bitter-sweet chocolate, finely chopped. (Or use 5 ounces 70 percent plus bitter-sweet chocolate and 5 ounces 50 percent plus semi-sweet chocolate, finely chopped.)
    • pinch of salt

    Directions:
    1. Combine the yogurt, milk (or heavy cream) and syrup in a small saucepan.
    2. Put the saucepan over medium heat and bring to a low boil. Add the chocolates, salt and reduce the heat to low. Stir until the chocolate melts. Remove from heat. 
    3. Serve immediately or cover and refrigerate until ready to use.

    Note:
    • To re-heat, microwave 15 second and stir, repeat four times (total heat up time is 1 min).
    • The use of name designations for chocolates is subject to food regulations and there are usually three types of baking chocolates on the market: milk chocolate, semi-sweet chocolate and bitter-sweet chocolate, plus more names (sweet chocolate, dark chocolate) to confuse us.
    • In the U.S., milk chocolate has to contain more than 10% chocolate liqueur, sweet chocolate - more than 15% and semi-sweet/bittersweet chocolate has to contain more than 35% chocolate liqueur.
    • Different brands of chocolate vendors have different cocoa contents for these types and the listed percentage on the product may be higher than the actual chocolate liqueur/bits content. Therefore, don't expect the same sweetness in the result of prepared food, even when you use the same type or the type with the same designated percentage from different vendors.
    • For example, if you use Ghirardelli bittersweet chocolate (designated 60%), use 10 ounce. If you use Scharffen Berger, Valrhona or Schokinag, use 5 ounces of their semi-sweet type (50%) and 5 ounces of their bitter-sweet type (70%). I like Guittard 72 % bittersweet for its smokiness and I use all ten ounces of this.
    • What's in the rest of chocolates? Mostly sugar and cocoa butter, and milk in milk-chocolate.


    Mocha Latte Sundaes!


    Ingredients (yield 2 servings):
    • 1 pint coffee frozen Greek yogurt (or chocolate flavor)
    • 1 cup hot espresso or strong coffee
    • 1 cup whole milk, steamed or whisked foamy in sauce pan
    • 1/4 cup warm dark chocolate sauce (See recipe here)
    • unsweetened whipped cream (optional)
    • chocolate shavings from 75 percent or more dark chocolate
    • 4 squares of brownies (2-inch size)

    Directions:
    1. If you don't have an coffee machine or a milk steamer, heat up whole milk to a rolling boil in a saucepan and whisk it to make it foamy and frothy.
    2. Microwave the brownies for 15 seconds, or wrap them in tin foil and warm up in 350F oven for 10 min.
    3. Place each brownie in a dessert cup and top with frozen Greek yogurt or ice cream. Pour 1/4 cup of the espresso and 1/4 cup of frothy milk over each serving. Drizzle each with 1 tablespoon of warm dark chocolate sauce. 
    4. Serve with whipped cream on top if desired and sprinkle chocolate shavings. Serve warm.
    Kahlua Coffee Liqueur
    Note:
    • Can also use frozen yogurt to replace frozen Greek yogurt or ice cream. Frozen Greek yogurt contains more protein and is thicker than frozen yogurt. Ice cream contains more fat from heavy cream and that's what makes it so tasty. 
    • Can use coffee liqueur, such as Kahlua, for adults. Replace 1 to 2 tablespoon of coffee with the liqueur.
    • Can use cold brew coffee concentrate, use 1/2 cup coffee concentrate and 1/2 cup water, mix and heat up to replace 1 cup of hot espresso.
    • Can use hazelnut syrup or caramel sauce to replace chocolate sauce.
    • Use hot chocolate and almondmilk instead of coffee and steamed milk for kids.
    • Can top with roasted and chopped nuts, such as pistachios, walnuts, or cashews.
    • Can top with raspberries or quartered strawberries.
    • Can top with vanilla caramel gelato for a little cold crunchiness.

    Monday, June 6, 2016

    Simple Two Ingredients Soup!

    Well, to make a soup, you can make it as complicated as Pork and Daikon Soup, or you can make it quick and easy like this.

    Ingredients:
    • 1 pound Pork Spareribs
    • 1/2 pound of daikon or turnip, peel and cut into chunks. 
    • 5 cups of water
    • 1 tsp salt

    Directions:

    1. Cut the ribs into smaller pieces between the bones.
    2. Wash them thoroughly. If you have time, blanch (what??) them in boiling water so the end result soup will be clear without too much scums.
    3. In soup pot, add all ingredients including the blanched ribs and cook for 30 to 45 min, depending on how tender you like your daikon to be. 
    4. Salt to season and serve.

    Note:
    1. Blanch means to cook an ingredient in boiling water for a short period of time and fish out to rinse in cold water. 

    Options:
    • Serve with sesame oil.
    • Serve with white pepper.
    • Serve with chopped scallion (green onion) or chives.
    • Replace pork ribs of other pork portions, preferably with bones because the bones are more flavorsome than the meat. However, it's okay to use boneless lean pork, such as top loin or even tenderloin. 
    • Replace daikon and cook ribs with tomatoes (cut into 8 wedges).
    • Replace daikon with cauliflowers  (cut into big pieces) or cook both with ribs.
    • Replace daikon with English cucumbers (peel and remove seeds, cut into thick slices) or cook both with ribs.
    • Replace daikon with Chinese yam (peel and cut into chunks) or cook both with ribs.
    • Add carrots (peel and cut into chunks) so it will be ribs, daikon and carrot soup.
    • Add celery (cut into chunks) so it will be ribs, daikon and celery soup.
    • Add 2 slices of ginger in the very beginning. Boil water with ginger and ribs for 15 min before adding the rest to cook 30 min more.
    • Add one green onion, cut into long sticks. Add with the daikon (or replacement vegetable).
    • Add 1 tablespoon Chinese rice wine together when you add ribs.
    • Add 1 to 2 table spoon of Goji berries, rinsed. Add them in the last 5 min of cooking process.
    • and on and on...  

    Secret Weapon:
    • Add 1/4 teaspoon dashi (What?).